

Table of Contents
- Signs of a Dirty Lawn Mower Carburetor
- How to Tell If Carburetor Is Clogged
- Tools and Materials: What You Need for the Job
- Lawn Mower Carburetor Cleaning Kit Options
- Step-by-Step: Removing and Disassembling the Carburetor
- Cleaning the Fuel Jet and Passages
- Inspecting Gaskets, O-Rings, and the Float Needle
- Reassembling and Reinstalling the Carburetor
- Keeping It Running: Maintenance After the Fix
- Frequently Asked Questions
Last Updated: September 24, 2026
Signs of a Dirty Lawn Mower Carburetor
A lawnmower carburetor mixes air and fuel before that mixture reaches the combustion chamber. When it gets dirty, the mix goes wrong and the engine tells you right away. Most people blame the spark plug first, usually a waste of time. Here's what a clogged lawnmower carburetor looks like:
- Hard starting. The engine cranks and cranks but won't catch, even with a fresh spark plug.
- Engine surging. The RPMs rise and fall in a rhythm, like the engine is gasping.
- Stalling under load. The mower dies the moment you hit tall grass.
- Rough idle. It runs, but it sounds uneven and shaky.
- Black smoke or a fuel smell. Too much fuel is getting through.
How to Tell If Carburetor Is Clogged
Before you pull a bolt, confirm the carburetor is the problem. A fouled spark plug, clogged air filter, stale fuel, or weak ignition coil all mimic a dirty carburetor. Rebuilding the wrong part wastes an afternoon and often introduces a new leak.
Step 1: The Fuel Flow Test
Pull the fuel line off the carburetor inlet, point it into a clear container, and turn the engine over a few times.
- Strong, steady flow: the blockage is inside the carburetor. Continue to Step 2.
- Trickle or nothing: the problem is upstream, a clogged in-tank filter, a pinched fuel line, a failing fuel shutoff valve, or a blocked tank vent. Fix that first.
Step 2: The Three-Point Confirmation
- Loosen the fuel bowl nut at the bottom of the bowl. If gas drips slowly or not at all, the main jet or needle valve is blocked.
- Remove the air filter and look into the carburetor throat. A dark, sticky film means varnish buildup. A clean, dry throat points elsewhere.
- Spray a short burst of carburetor cleaner into the intake and try to start it. If it fires briefly and dies, you've confirmed a fuel delivery issue. If it does nothing at all, suspect ignition or compression instead.
Symptom-to-Cause Table: Is It Really the Carburetor?
Use this table before committing to a teardown. Each row pairs a symptom with the likely cause and fastest confirming test.
| Symptom | Most Likely Cause | Quick Confirmation |
|---|---|---|
| Cranks but won't fire, dry plug | No fuel reaching cylinder | Spray carb cleaner into intake, brief fire confirms fuel starvation |
| Cranks but won't fire, wet plug | Flooded carb or stuck float needle | Smell gas at plug; tap bowl with screwdriver handle |
| Starts cold, dies after 5-10 minutes | Varnish in main jet or emulsion tube | Fuel flow test at inlet; bowl nut drip check |
| Surging RPM at idle | Lean idle circuit or vacuum leak | Spray carb cleaner around intake gasket, RPM change reveals leak |
| Dies under load in tall grass | Clogged main jet or restricted fuel flow | Inspect main jet for varnish; check fuel line for kinks |
| Black smoke, gas smell, rough run | Rich mixture from worn float needle | Pull bowl; check needle tip for groove |
| Runs only with choke partly on | Blocked idle passage | Soak and blow out idle port; verify daylight through passage |
| Backfires through carburetor | Lean condition or timing | Check valve clearance and flywheel key before touching carb |
Why Ethanol Fuel Accelerates the Problem
Ethanol-blended gasoline, the E10 blend sold at nearly every pump, absorbs moisture from the air. Left in a carburetor bowl for a few weeks, that moisture separates and forms a corrosive layer that attacks aluminum, brass, and the rubber tip of the float needle. The varnish left after the fuel evaporates is the gummy residue that clogs the main jet and emulsion tube.
Tools and Materials: What You Need for the Job
You don't need a full shop to rebuild a small engine carburetor. A basic hand tool set and a clean work surface cover most jobs.
What you'll need:
- Socket set with a 10mm and 12mm socket
- Flathead and Phillips screwdrivers
- Needle-nose pliers
- Carburetor cleaner spray
- Compressed air or a can of air
- A shallow container for soaking parts
- New gasket kit and O-rings
- Clean rags and a small wire brush
- Safety glasses and nitrile gloves
Lawn Mower Carburetor Cleaning Kit Options
Before buying a kit, identify which carburetor you have. The two families look similar outside but rebuild completely differently, and the wrong kit is the most common reason a first-time repair stalls halfway through.
Float-Type vs. Diaphragm-Type: Which One Do You Have?
Float-type carburetors are most common on four-stroke push mowers and riding mowers. They have a removable fuel bowl held on by a single bowl nut. Inside, a brass or plastic float rises and falls with fuel level, working a needle valve to control flow. A bowl with a nut at the bottom means float-type.
Matching the Kit to the Carburetor
| Kit Type | What's Included | Best For |
|---|---|---|
| Basic cleaner only | Solvent spray, brush | Light varnish on a float-type carb, quick fixes |
| Float-type gasket kit | Bowl gasket, O-rings, needle, sometimes float pin | Rebuild after cleaning a float-type carb |
| Float-type full rebuild kit | Gaskets, needle valve, float pin, main jet, emulsion tube | Heavy clog or worn parts on a float-type carb |
| Diaphragm kit | Diaphragm, gasket, metering lever spring, needle | Any diaphragm-type carb rebuild |
| Universal fit kit | Assorted gaskets, O-rings, needles, hardware | Shops servicing multiple brands and carb types |
For a single float-type mower with a light clog, a cleaner and a float-type gasket kit will do. If the carburetor has never been opened, buy the full rebuild kit, gaskets crack when dry, and reusing an old one almost always leaks. Diaphragm carbs are a different job: the diaphragm hardens with age and stops pumping, which is why a trimmer that ran fine last season won't prime this season.
How to Find Your Model Number
Before ordering, locate the engine model number stamped on the engine block or a metal tag on the deck. On walk-behind mowers it's on the front of the deck or rear of the engine shroud; on riding mowers, under the seat or on the frame near the battery. Write the full number down, including prefix letters, and match it to the kit's fitment list.
What to Do With the Old Parts
Lay the old gasket, needle, and diaphragm next to the new ones before installing anything. If they don't match in shape or thickness, you have the wrong kit, return it before opening the carburetor. This two-minute check prevents the job's most frustrating failure: getting the carburetor apart and finding the replacement won't seal.
Step-by-Step: Removing and Disassembling the Carburetor
Removing the carburetor takes about 15 minutes on most push mowers. Work on a clean bench so small parts don't roll away.
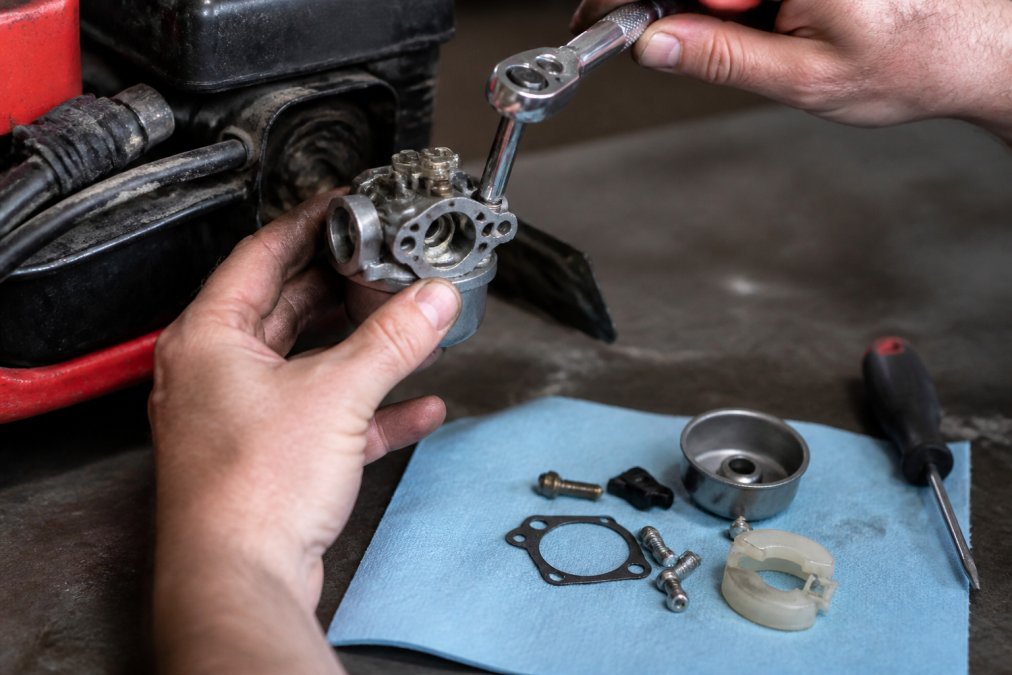
Removing the Carburetor
- Disconnect the spark plug wire. Pull it off the plug and tuck it aside. This stops the engine from firing while you work.
- Shut off the fuel supply. Clamp the fuel line or drain the tank into a safe container.
- Label your connections. Take a photo of the fuel linkage, throttle cable, and choke lever before you touch anything.
- Loosen the mounting bolts. Most carbs bolt to the engine block with two nuts. Support the carburetor as you remove the last one.
- Pull the carburetor free. Slide it off the mounting studs and set it on your bench.
Disassembling the Fuel Bowl and Jets
- Remove the fuel bowl nut at the bottom of the bowl. Fuel will spill, so hold it over your container.
- Lift off the fuel bowl and set the gasket aside.
- Pull the float pin with needle-nose pliers. The float and float needle will drop free.
- Unscrew the main jet with a flathead screwdriver. It sits behind the bowl nut.
- Remove the emulsion tube if it's threaded. Note its orientation before pulling it out.
Lay every part out in removal order, reassembly goes much faster when you can see the sequence.
Cleaning the Fuel Jet and Passages
Soak the metal parts in carburetor cleaner for 20 to 30 minutes. A quick spray won't dissolve hardened varnish.
After soaking:
- Blow compressed air through every passage. Start with the main jet, then the emulsion tube, then the idle screw port.
- Check the venturi for a smooth, clean surface. Any grit here disrupts the air-fuel mixture.
- Clear the fuel inlet screen. A tiny mesh filter sits behind the needle valve seat.
- Run a thin wire through stubborn jet holes, then flush again.
Inspecting Gaskets, O-Rings, and the Float Needle
Replace every gasket and O-ring you touch. They're cheap, and a dried-out gasket is the top cause of a post-rebuild leak.
Check these parts closely:
- Float needle. Look for a groove or ring worn into the tip. A worn needle won't seal, and the bowl will flood.
- Float. Shake it near your ear. If you hear liquid inside, it has a pinhole leak and must be replaced.
- Bowl gasket. Any flat spots, cracks, or stiffness mean replacement.
- O-rings. Look for flattening or nicks. A damaged O-ring on the needle seat causes constant fuel seepage.
Reassembling and Reinstalling the Carburetor
Reassembly is the reverse of disassembly, with two adjustments that decide whether the engine runs right.
Reassembly Tips
- Seat the float needle first. Drop it into the seat, then set the float on top and slide the float pin through.
- Check float height. With the carburetor upside down, the float should sit roughly level with the bowl mating surface. Bend the tab only if it's clearly off.
- Install the main jet before the bowl. It threads up into the center tower.
- Fit the new bowl gasket dry. Don't add sealant, which can break loose and clog the jet.
- Snug the bowl nut by hand, then a quarter turn with the wrench. Overtightening warps the bowl.
Reinstalling on the Mower
- Slide the carburetor onto the mounting studs and start both nuts by hand.
- Tighten the mounting nuts evenly. Alternate between them so the carburetor seats flat.
- Reconnect the fuel line, throttle cable, and choke lever using your photo as a guide.
- Set the idle screw two turns out from lightly seated as a starting point.
- Reconnect the spark plug wire and add fresh fuel.
- Start the engine and let it warm up. Adjust the idle screw until it runs smooth.
If the engine surges after the rebuild, the idle screw is too lean. Turn it out a quarter turn at a time until the surging stops.
Keeping It Running: Maintenance After the Fix
The repair is only half the job. What you do next decides whether you're back on the bench in six weeks.
- Use fresh fuel. Buy only what you'll burn in 30 days.
- Add a fuel stabilizer if the mower sits longer than a month.
- Run the carburetor dry before winter storage. Close the fuel shutoff and let the engine idle until it stalls.
- Replace the air filter at the start of each season. A dirty filter pulls grit into the carburetor.
- Check the spark plug while you're in there. A fouled plug mimics carburetor symptoms.
- Inspect the fuel line for cracks. Old lines shed rubber particles that clog jets.
Do these and most carburetor problems never come back.
Frequently Asked Questions
Is it hard to fix a carburetor on a lawn mower?
Not if you take it step by step. Most homeowners can handle a basic carburetor cleaning and gasket replacement with common hand tools. The job takes about an hour for a first-timer. The trickiest parts are keeping track of small parts like the float needle and O-rings, and setting the idle screw correctly. If you have a rebuild kit and a clean workspace, the repair is manageable.
How do I know if my lawn mower carburetor is bad?
Look for hard starting, engine surging, stalling, or black smoke. A bad carburetor often shows varnish buildup inside the fuel bowl, a stuck float needle, or a clogged main jet. If the engine only runs with the choke partially on, the air-fuel mixture is off. Checking these symptoms against the signs of a dirty lawn mower carburetor helps you decide whether to clean or replace it.
How do you unclog a carburetor without removing it?
You can try a carburetor cleaner spray and a fuel additive. Run the engine, spray cleaner into the air intake, and let it soak. For a mild clog, this can dissolve varnish buildup. But if the main jet or emulsion tube is blocked, you will need to remove the fuel bowl and clean the passages manually. A lawn mower carburetor cleaning kit with thin wires and solvent works best for a thorough job.
Should I clean or replace my lawnmower carburetor?
Clean it if the carburetor is otherwise intact and the gaskets are not torn. A rebuild kit with new gaskets, O-rings, and a float needle costs less than a new carburetor and restores performance. Replace it if the venturi is corroded, the throttle shaft has excessive play, or the carburetor body is cracked. For most ethanol-related fuel degradation issues, a thorough cleaning and rebuild kit solves the problem.
A clogged carburetor will sideline your mower at the worst possible time, usually mid-season with grass piling up. Fixing it yourself takes an afternoon and a basic tool set, and it saves you a trip to the repair shop. Over The Hill Tractor carries the gasket kits, O-rings, float needles, and universal fit components that make the job go smoothly, with durable parts designed for long-term maintenance. Add to cart and get your equipment running again.